How to Receive QuickBooks Customer Payments
Streamlining Your Invoicing Workflows and Securing Earned Revenue
QuickBooks was designed to make your daily accounting tasks easier, faster, and more accurate with built-in, automated processes. If you’ve been using QuickBooks for a while, you’ve probably found that to be true—providing you are following the proper workflows. Some administrative chores, of course, aren’t so enjoyable, like paying bills, reconciling your bank accounts, or anything else that reduces the balance in your checking registers.
By contrast, the process of receiving customer payments is one of your more enjoyable responsibilities. You have supplied a premium product or service that your customer valued, and you are now collecting the earned revenue due to your business.
Depending on your specific business situation, you’ll use one of multiple methods to record customer payments. If you use an industry-specific shop management system (such as CCCone in the collision industry), you should always begin by receiving the payments in that system first. Allowing the integration to bring those payments into QuickBooks automatically ensures your primary operational records and your financial ledger remain in perfect balance.
Here is a practical look at your core payment-processing options.
The “Receive Payments” Screen
If you are like many businesses, you issue invoices to customers showing exactly what they owe and when their payment is due. One of the primary ways to record these transactions is by using the Receive Payments window. This is the specific screen where third-party shop management systems typically transfer payments you have received.
To manually receive payments for outstanding jobs, click the Receive Payments icon on your QuickBooks home page (or your customized top Menu Bar), or navigate to Customers > Receive Payments in the main program menu.
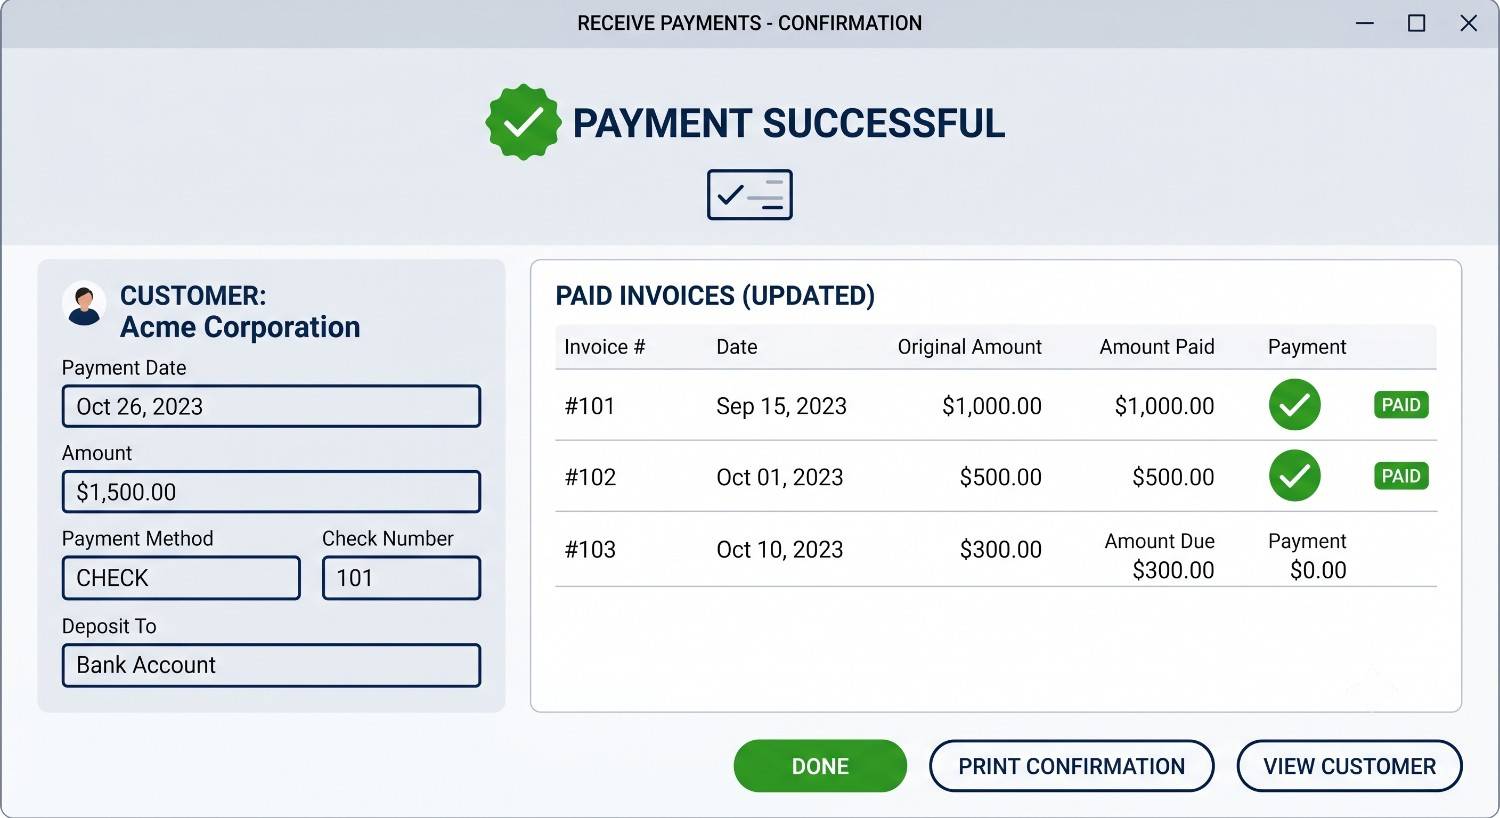
Figure 1 – Use QuickBooks’ Receive Payments screen when recording a payment made in response to an invoice only.
⚠️ CRITICAL PROCESS EXCEPTION
Do NOT use the Receive Payments window to record non-earned revenues, such as parts manufacturer rebates, insurance refunds, or vendor discounts. Recording these as customer payments will heavily distort your Accounts Receivable. Non-earned funds must be entered directly on your Deposit Form and mapped to their appropriate expense reduction or other income accounts.
The first thing you’ll do on this screen is choose the correct customer and job by clicking the down arrow in the field to the right of RECEIVED FROM. The outstanding balance for that customer will appear in the upper-right corner, and all unpaid invoices will be displayed in the grid below.
Enter the exact PAYMENT AMOUNT received and verify that the transaction DATE is correct. (The REFERENCE # field automatically updates to CHECK #when the check payment option is selected.)
Next, ensure the payment is applied to the correct invoices. If the payment covers the entire outstanding balance, QuickBooks will automatically check every row in the first column of the table (providing your Company Preferences are set to apply payments to oldest invoices automatically).
If the payment is for a partial amount and you wish to apply it to a specific invoice rather than the oldest one, click Un-Apply Payment in the top icon bar and click directly in front of the correct rows to allocate the funds manually.
💡 Crucial Note for Integrated Shop Management Systems:
If you use an external management system (like CCCone or Mitchell), this automatic “applying” to an invoice does not always occur during the database sync. Because of API integration limitations, QuickBooks often leaves these as unapplied payments. This results in the customer having a zero balance overall, but your reports will show a messy trail of open invoices and unapplied payment credits.
To prevent this, run an Open Invoice Report at least weekly. Review all active jobs. If a job shows an invoice and an equivalent payment credit listed separately, double-click the transaction and manually check the box to apply the payment to the open invoice. A clean Accounts Receivable report should only display jobs with actual outstanding balances.
Multiple Payment Methods
Next, you must specify the payment method the customer is using. If you use a third-party management system, you must ensure that your Payment Types match exactly in both the management system and QuickBooks to prevent sync errors.
QuickBooks displays four default options on the payment bar:
CASH
CHECK
CREDIT/DEBIT
e-CHECK
If the payment method you need is not shown in the main bar, click the down arrow under MORE to view additional custom options (such as direct ACH, wire transfers, or gift certificates).
If the required method is still missing, you can select Add New Payment Method directly from the dropdown to keep your transaction records perfectly aligned.
When you select a credit card option, QuickBooks opens an internal card entry window for processing details.
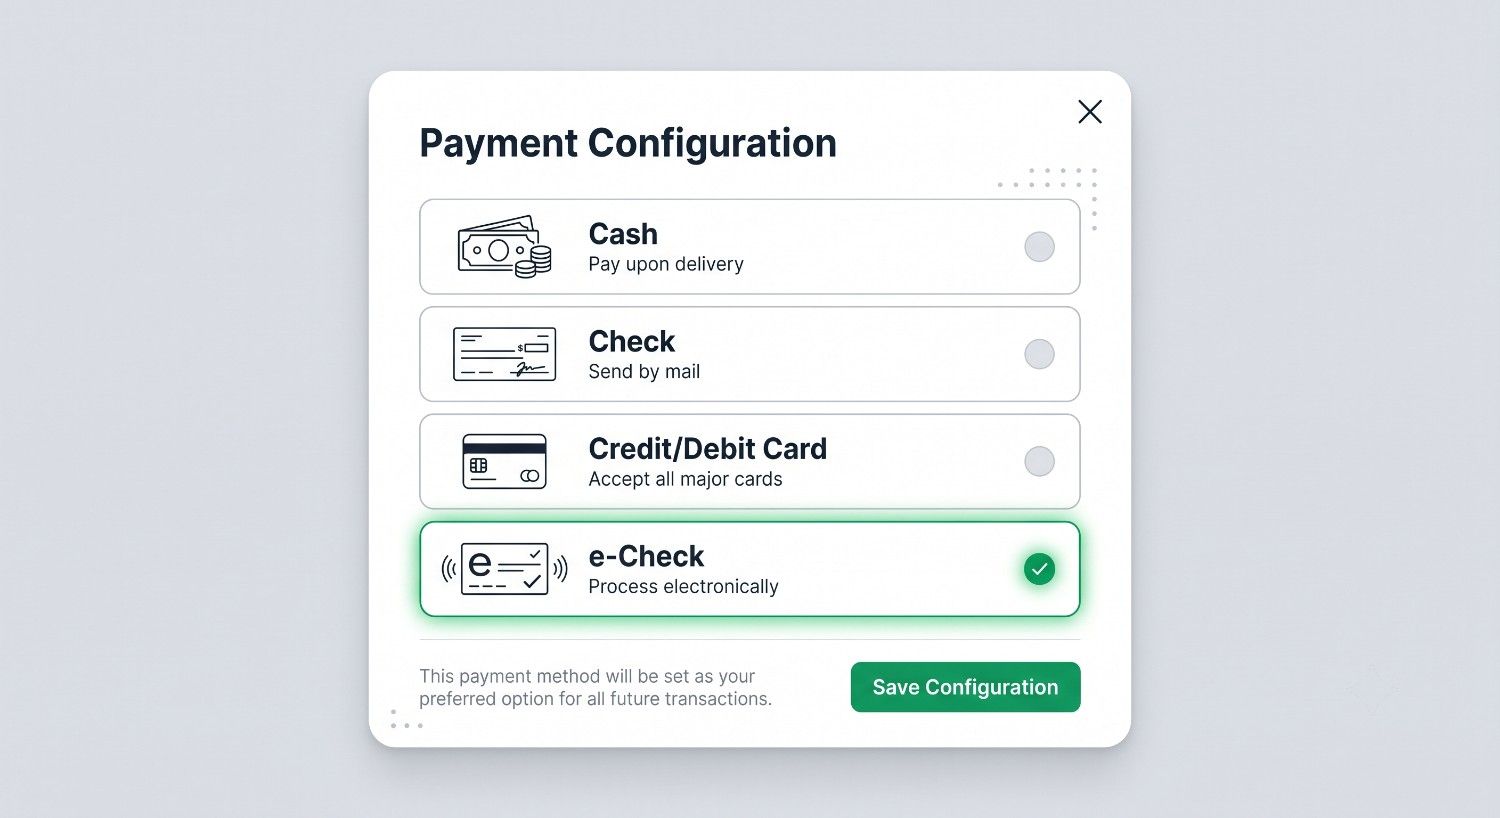
The Payment Method window
If you utilize Intuit Merchant Services, saving the transaction will process the card directly, prompt you for additional billing information, and return a real-time approval or decline message.
If you do not accept credit cards yet, or are looking to eliminate your processing overhead, be aware that credit card fees can drain thousands of dollars from your bottom line annually. We have evaluated numerous solutions and partnered with a merchant provider that offers a zero-fee program to eliminate credit card processing costs completely. You can review this savings opportunity by clicking below:
Instant Sales & Receipts
Depending on your business model, there may be times when a customer purchases products or services on the spot. In these scenarios, you should bypass the invoicing process entirely and issue a Sales Receipt.
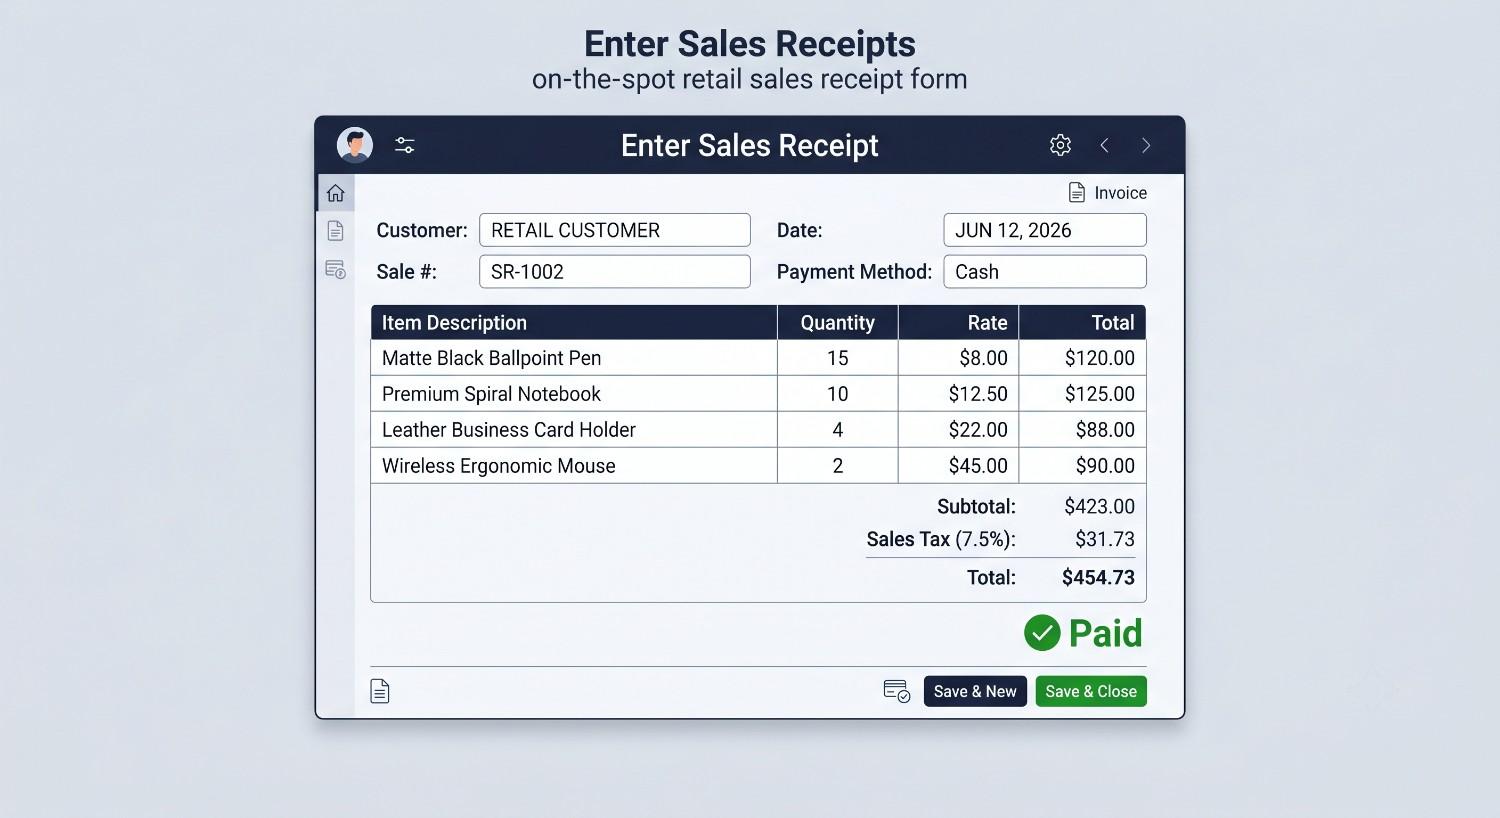
Figure 3 – The Enter Sales Receipts window
As a general rule, use Invoices if your customers are going to pay at a future date (such as billing insurance companies). Use Sales Receipts for on-the-spot transactions where the payment is completed at the exact same moment the transaction is recorded. You will complete this form much like you enter data in the Receive Payments window, and you can instantly print, mail, or email the receipt to your customer.
Recording customer payments correctly is essential to protecting your cash flow and ensuring your general ledger balances. In our next guide, we will look closely at the bank deposit process—highlighting how to manage the Undeposited Funds account to ensure your reconciliations remain flawless.
Regardless of whether you run a for-profit or non-profit organization—be it a service shop, general contractor, or local church—you must always strive for best-in-class financial practices. Taking the time to “steer your ship” in the right direction relies entirely on obtaining accurate and timely information from QuickBooks.
We frequently see three primary reasons businesses fail to get reliable, timely financial reports from QuickBooks:
Outdated File Setup: The initial configuration and Chart of Accounts were never set up correctly to match your operational metrics.
Insufficient Training: You and your staff have not been properly trained on how to use QuickBooks features correctly.
Lack of Process Commitment: The business has not made the operational commitment to complete month-end closings on time, depriving managers of actionable data.
Our company, AEII (QuickBooks R Us), is dedicated to helping small businesses achieve their operational goals by providing the structured training, file clean-ups, and security integrations they need to succeed.
📅 Book Your Session Now
Free 30-Min Consultation • No Obligation